How to Reverse Sear the Perfect Ribeye: A Carnivore's Secret Weapon
Discover the reverse sear method for flawless ribeye steaks—even cooking, crispy crust, pure carnivore joy. Perfect for meal-prep with precise oven temps and pro tips. Elevate your home cooking today.
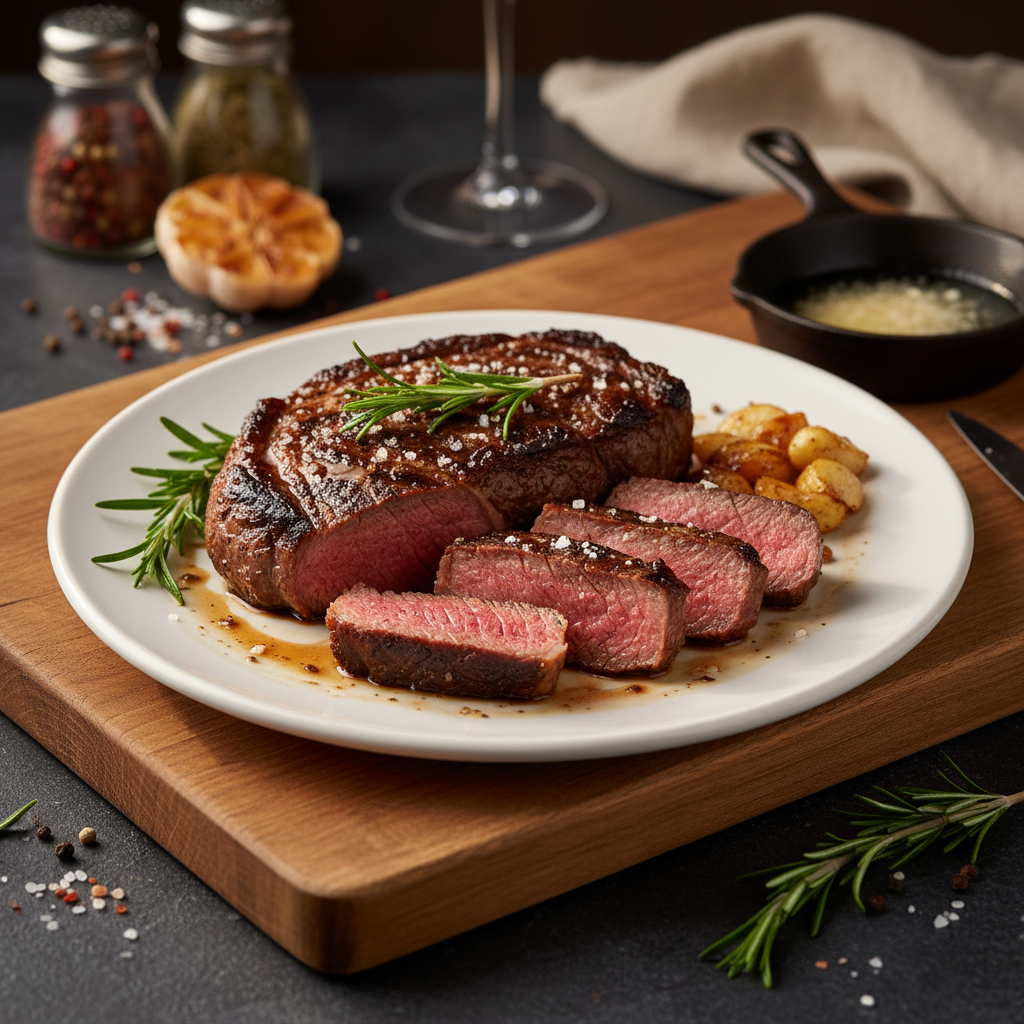
As a dedicated carnivore, few things rival the satisfaction of sinking your teeth into a perfectly cooked ribeye steak—juicy, tender, with a caramelized crust that crackles under pressure. But achieving that steakhouse magic at home can be elusive. Enter the reverse sear: the carnivore's secret weapon for foolproof, restaurant-quality results. This method flips the script on traditional searing, starting low and slow in the oven before a high-heat cast iron finish. In this comprehensive guide, we'll walk you through every step, from selecting prime ribeye to mastering oven temperatures, resting times, and that all-important sear. Whether you're meal-prepping for the week or treating yourself to a solo feast, reverse searing ribeye elevates your carnivore game to elite levels.
What is Reverse Searing and Why It's a Game-Changer for Ribeye
The reverse sear technique involves cooking your steak low and slow in the oven first to reach the desired internal temperature precisely, then finishing with a screaming-hot sear in a cast iron skillet. Unlike the conventional high-heat sear-first method, which risks overcooking the edges while chasing perfection in the center, reverse searing ensures edge-to-edge doneness. For ribeye—with its rich marbling and bold flavor—this is revolutionary.
Imagine pulling a ribeye from the oven at exactly 115°F internal for medium-rare, letting it rest briefly, then blasting it for just 60-90 seconds per side in a rip-roaring hot pan. The result? A steak that's blushing pink from rim to rim, with a crust that rivals any high-end steakhouse. This precision is especially valuable on a carnivore diet, where steak is king, and consistency means you can confidently meal-prep batches without guesswork.
The Science Behind Reverse Searing
At its core, reverse searing leverages the principles of heat transfer. Low oven temps (around 225-250°F) gently raise the internal temperature without forming a crust prematurely, minimizing moisture loss. The final sear creates the Maillard reaction—that beautiful browning—only on the surface. Studies from cooking science experts like Kenji López-Alt highlight how this method reduces overcooking by up to 50% compared to traditional searing, preserving those precious juices locked in the ribeye's fat cap.
For carnivores, this translates to more flavor per bite. The even cooking prevents the dry, gray bands that plague pan-seared steaks, ensuring every ounce delivers pure beefy bliss.
Selecting the Perfect Ribeye for Reverse Searing
Not all ribeyes are created equal, and choosing wisely sets the foundation for success. Look for steaks at least 1.5-2 inches thick—thinner cuts won't benefit as much from the low-and-slow phase. Prime grade is ideal for its abundant marbling, which bastes the meat during cooking, but Choice works well too if you're budget-conscious.
- Marbling Matters: Seek bright white fat veins spiderwebbing through the deep red meat. This intramuscular fat melts into savory liquid gold.
- Cap of Fat: A 1/4-inch thick fat cap adds richness; don't trim it excessively.
- Freshness Check: Firm texture, minimal liquid in the package, and a fresh, metallic scent scream quality.
For meal-prep enthusiasts, buy bone-in ribeyes in bulk from a trusted butcher or warehouse club. They're often cheaper per pound and portion easily. Pro tip: Let your ribeye sit at room temperature for 30-60 minutes before cooking to ensure even heating—a carnivore staple for optimal results.
Essential Tools and Ingredients for Success
Minimalism is carnivore creed, but the right gear elevates reverse searing from good to god-tier.
- Cast Iron Skillet: 12-inch Lodge or similar; nothing sears like seasoned cast iron.
- Instant-Read Thermometer: ThermoWorks Thermapen for pinpoint accuracy—don't eyeball it.
- Wire Rack and Baking Sheet: For oven circulation.
- High-Smoke-Point Oil: Avocado or refined beef tallow; butter for basting.
- Seasoning: Kosher salt and coarse black pepper. Optional: garlic powder for carnivore-approved umami.
Ingredients are simple: one 16-20 oz ribeye per person. For meal-prep, scale up to 4-6 steaks. Total cost per serving? Under $10 for prime bliss.
Step-by-Step Reverse Sear Ribeye Guide
Now, the main event. This process takes 45-60 minutes total, yielding perfection every time.
Step 1: Prep Your Ribeye
Pat dry with paper towels—moisture is the enemy. Season generously on all sides with salt (1 tsp per pound) and pepper. For enhanced flavor, salt 24-48 hours ahead in the fridge uncovered (dry-brining). This draws out moisture then reabsorbs it, tenderizing and concentrating beefiness—a meal-prep hack that pre-seasons batches.
Step 2: Oven Phase for Precise Doneness
Preheat oven to 225-250°F. Place steak on a wire rack over a baking sheet. Insert thermometer probe if using an oven-safe one. Cook until internal hits 10-15°F below target: 115°F for rare, 120°F medium-rare, 130°F medium. Time? 45-60 minutes for 2-inch thick. Pull early; it'll rise 5-10°F during sear.
Actionable advice: Rotate halfway for even cooking. No oven? Smoker at 225°F adds smoky depth.
Step 3: Resting—The Unsung Hero
Remove from oven, tent loosely with foil. Rest 10-20 minutes on a cutting board. This redistributes juices, preventing a dry sear. Temps stabilize here; use this time to heat your skillet smoking hot (open windows!).
Step 4: The Cast Iron Sear
Heat skillet over high burner 5 minutes until wisps of smoke appear. Add 1 tbsp oil, swirl. Place steak in—loud sizzle confirms readiness. Sear 45-60 seconds per side, including edges and fat cap with tongs. Add butter, garlic, thyme for basting optional. Target final internal: 125°F rare, 130°F medium-rare.
Rest 5 minutes post-sear. Slice against grain. Heaven awaits.
Pro Tips and Troubleshooting for Carnivore Perfection
Elevate your game with these insider hacks:
- Thickness is Key: Under 1.5 inches? Skip reverse sear for direct pan method.
- Multiple Steaks: Cook in batches; don't overcrowd oven or pan.
- Smoke Control: Use a splatter screen; vent well.
- Flavor Boosts: Post-sear compound butter with bone marrow for decadence.
- Temperature Targets Recap: Oven to 115°F (med-rare), sear to 130°F.
Common pitfalls: Skipping thermometer (leads to overcook), cold pan (no crust), rushing rest (juicy loss). Avoid by measuring twice, cooking once.
Meal-Prep Magic: Reverse Sear Ribeyes for the Week
Carnivores thrive on efficiency. Reverse sear shines for meal-prep: Cook 4-6 ribeyes Sunday, slice, portion into containers. Oven phase scales perfectly; sear in one hot pan rotationally. Store cooled slices in airtight glass; fridge 4-5 days, freeze 3 months. Reheat gently sous-vide (130°F) or low oven to preserve texture—no microwave mush.
Pro meal-prep tip: Vacuum-seal pre-seared oven-cooked steaks, freeze, thaw overnight, then sear fresh. Weekly steak salads, bowls, or solo slabs ready in minutes. Nutrition? Pure protein and fat: 50g+ protein, 60g fat per ribeye—carnivore fuel.
Variations: Cowboy ribeyes (bone-in) for grandeur; Wagyu for luxury. Always reverse sear.
Conclusion: Claim Your Reverse Sear Mastery
Mastering the reverse sear ribeye isn't just a recipe—it's a carnivore rite of passage. With controlled oven temps, strategic resting, and that blistering cast iron kiss, you'll produce steaks that shame steakhouses. Embrace meal-prep to fuel your zero-carb lifestyle effortlessly. Next grill night or weekly prep, fire up this method. Your taste buds, satiety, and inner caveman will thank you. Grab that ribeye and sear on—perfection awaits.
Frequently Asked Questions
Related Glossary Terms
Join the Community
Weekly recipes & tips

Join the Carnivore Community
Get weekly recipes, tips, and success stories delivered to your inbox.
No spam, ever. Unsubscribe anytime.